The Live Timings page shows live timings information about the event currently running on your server. It has a lot of data, this page will aim to familiarise you with how to best utilise it!
Live Timings are persisted in looping sessions, so if you run a looping two hour practice for a full week the Live Timings will collect information about all laps completed during that week.
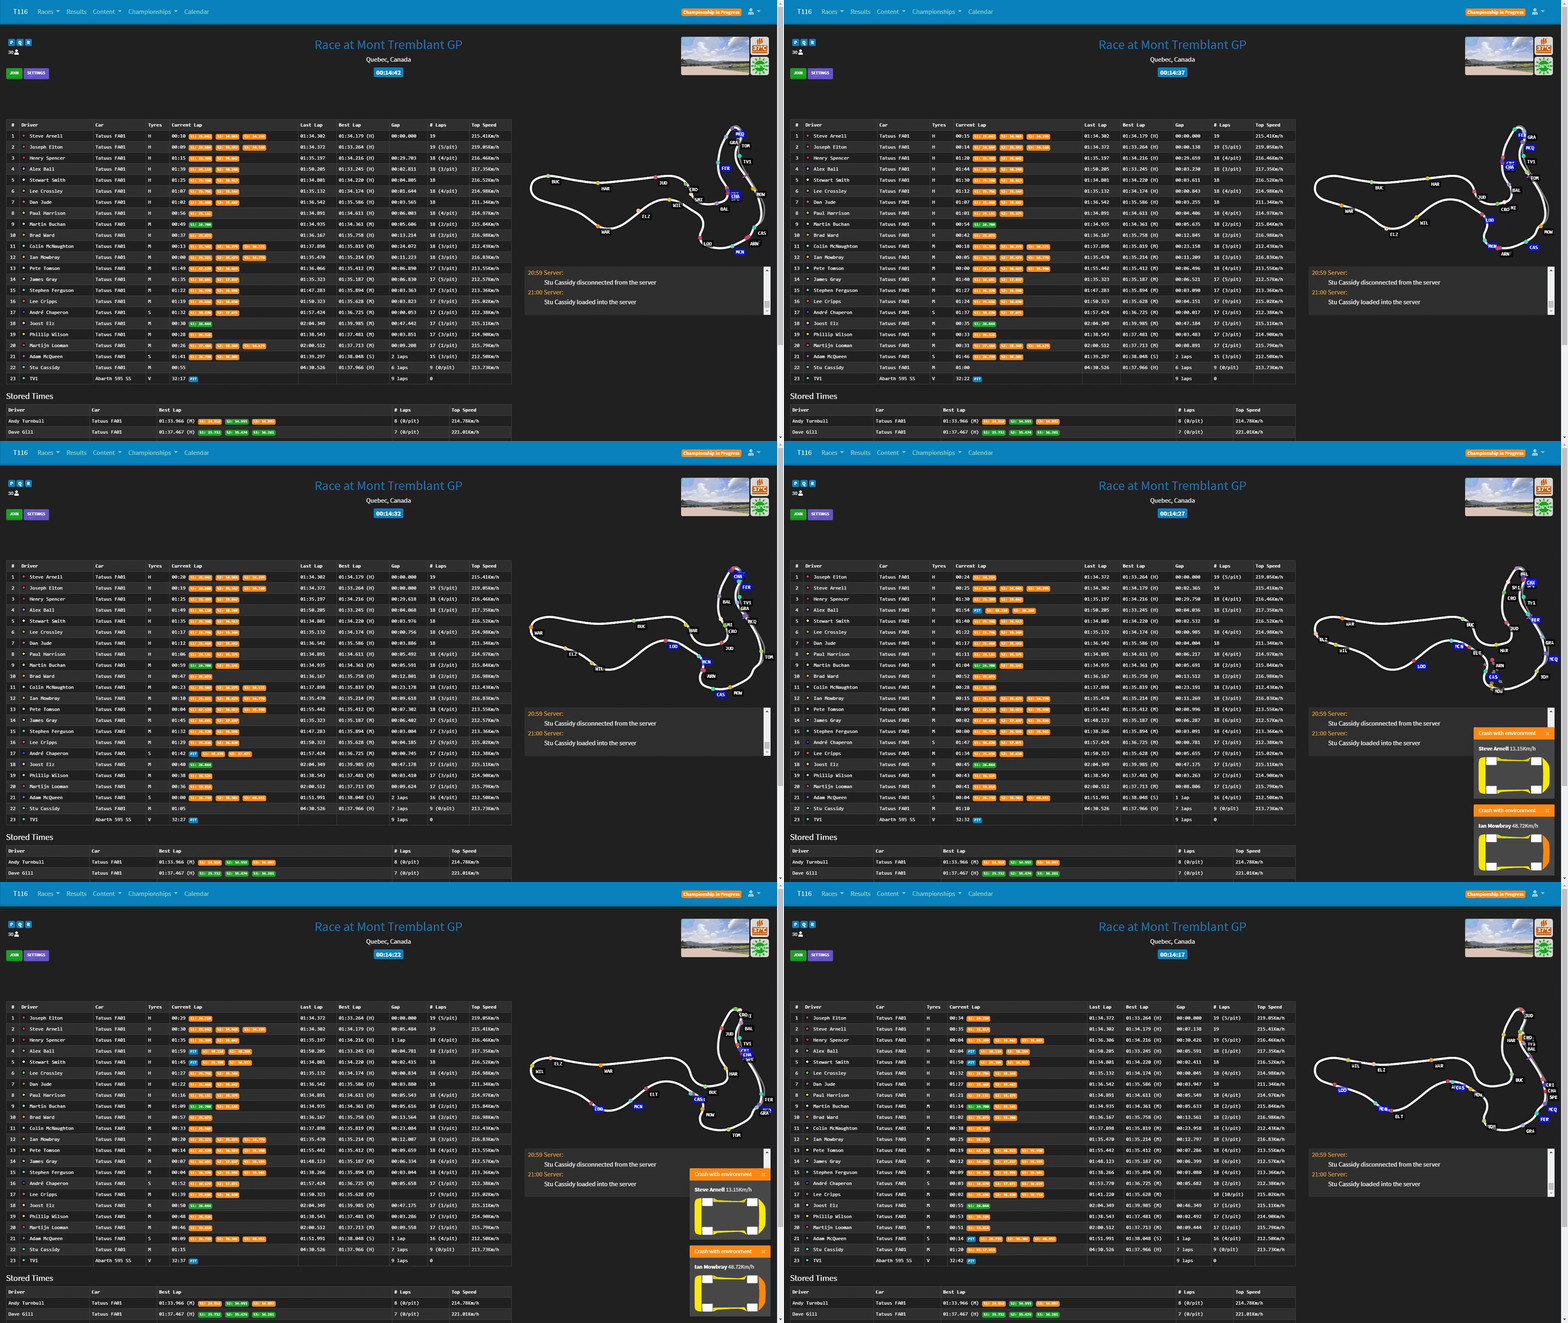
¶ Information/Control Section
The top of the Live Timings page contains some information about the currently running event as well as some buttons you can use to edit the behaviour of the page and perform admin actions (if logged in as an admin).
¶ Info
The top left of the page shows the sessions configured in the current event and the number of entrants, if you hover over the number of entrants it will show the names of the entrants.
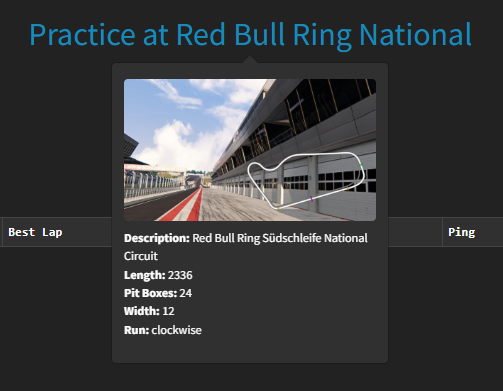
In the center of the page you can see the type of the current session as well as the name of the track, clicking this will show some extra information about the current track.
The top right of the page shows the current weather, track temperature and ambient temperature.
¶ Buttons
Live Timings buttons are located at the top left of the page, beaneath the session/entrants information.

-
Join - Join the server via Content Manager, this link will open Content Manager and open a window with the server information and ability to join/favourite etc. You can also right click and "Copy link address" to get a link that you can share with your community of drivers.
-
Settings - Allows you to hide collision popups on the Live Timings page (these can be seen in the gif above). This setting will only hide the collisions for you in your current browser session. If you want to hide the collision popups for everybody by default you can do so using the "Hide Collision Popups" option on the Server Options page.
-
Admin Panel (only available if logged in as admin) - Allows admins quick access to multiple administration functions directly from the Live Timings page. Most of these are self-explanatory, the "Broadcast Countdown" will send a synchronised ten second countdown to all drivers, which is useful for starting drift tandems and other similar things.
-
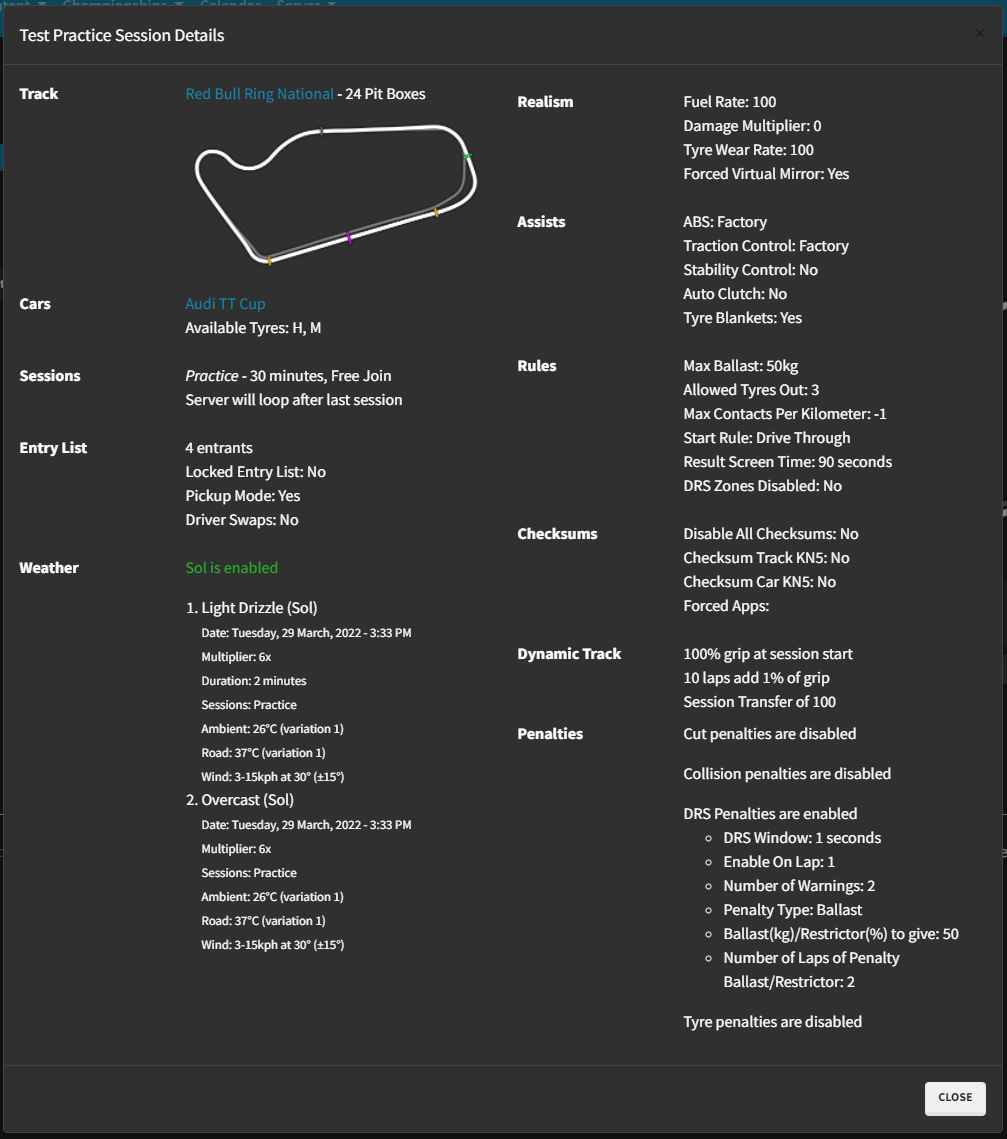
Event Details - Loads a popup with the full current event details as below.
- Plugin Links - If you are using the built in ACSM support systems for Stracker or Kiss My Rank then links to their respective control panels will be added here.
¶ Main Table
The main table shows a leaderboard of all drivers currently connected to the server, ordered by their position in the session (best lap for practice and qualifying sessions, race position for race sessions).
For each driver there are multiple columns:
-
Driver - The name of the driver and the colour of their dot on the Track Map. Hovering over the name in this column will highlight the drivers name on the Track Map. Clicking the drivers name will expand/hide the drivers info on the Track Map, which includes current speed, gear, RPM and steering angle.
-
Car - The name of the car that the driver is currently driving.
-
Tyres - The tyre type/compound that the driver is currently using.
-
Current Lap - The timer for the current lap, as well as each sector time as the driver completes each sector. The background colours of the sector times in the Key section of this page. This column also displays an indicator if a driver is:
- Using DRS: DRS
- In the pits: PIT
- Completed the race:
- Driver Swap: 17s (mid-swap, time remaining) × (received penalty for incorrect swap) ✓ (successfully completed swap)
-
Last Lap - The lap time of the last lap completed by the driver.
-
Best Lap - The best lap time completed by the driver (with the tyre type/compound they completed that lap on in brackets).
-
Gap - The gap between this driver and the driver in front of them in the session.
-
# Laps - Number of laps completed by the driver (with the number of laps since their last pit stop in brackets)
-
Top Speed - The top speed that the driver has achieved at any time.
-
Ping - The current ping of the driver.
¶ Stored Times
The stored times table shows information (driver name, car, best lap with tyre and sectors, number of laps and top speed) for drivers that have set times on the server and then disconnected. If a driver in the stored times reconnects to the server they will be moved back into the main table.
Stored times can be manually cleared using the "Delete Live Timings" button on the Server Options page, and will be automatically cleared if a new event on a different track is started.
¶ Track Map
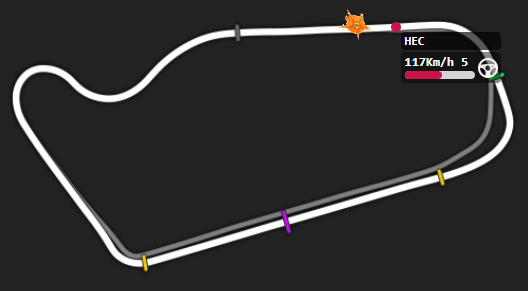
The track map shows the current position on track of all of the drivers connected to the server. The track map also shows the start/finish line, sectors and DRS zone information, information about these markings can be seen in the Key.
Each driver has a coloured dot, which matches the coloured dot next to their name in the Main Table. Hovering over their name in the main table list will highlight them on the map, and clicking on their name in the main table will display some extra information by the driver on the map (current speed, gear, RPM and steering angle).
The map will also indicate when a driver has a blue flag by setting the background behind their name to be blue.
The map will also display a little crash animation when a driver has a collision, like I did here:
¶ Key
The Live Timings key can be accessed using the "Key" link below the Track Map. The key contains a description for every icon that can appear on the Live Timings page.

¶ Chat Window
The chat window is displayed beneath the Track Map, and keeps a history of the in-game chat, complete with driver names and timestamps. Admins can also broadcast messages into the chat from the Live Timings page.

¶ IFrames
The Iframe system allows you to embed other webpages via Iframes on the Live Timings page. This is most often used to embed Live Streams showing the current event, but could also be used for anything else you can think of.
A lot of websites (such as Twitch) require that your website is using valid SSL certificates in order to embed content from them like this. If you're hosted with Emperor Servers then your Manager is already running SSL, but if you're self hosting you may need to Run a Reverse Proxy or similar.
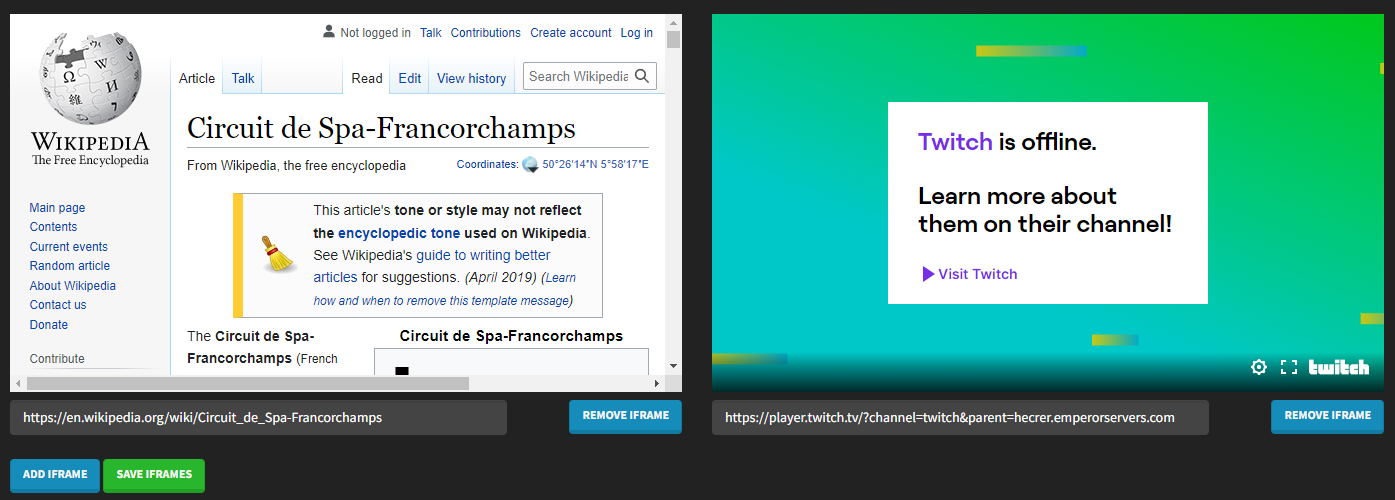
Let's add a few pages to a Live Timings page as an example. Say I'm running an event at Spa and I want to embed a Wikipedia page about the track, I can just add the Wikipedia link directly by doing the following on the Live Timings page:
- Click "Add Iframe"
- Input the link in the text box that appears (https://en.wikipedia.org/wiki/Circuit_de_Spa-Francorchamps)
- Click "Save Iframess"
And that's it, the Spa-Francorchamps Wikipedia page is now embedded in my Live Timings page and will be displayed to anybody that visits it. Users that are not logged in to a write account or higher will only see the embedded content, not the text inputs and buttons to control them.
Now say I want to also embed my twitch stream:
- Open the stream you want to embed on Twitch
- Click the share icon beneath the stream (it should be right beneath the viewer count)
- Click "embed"
- Find the section that says Using an iframe, it should look like this:
<iframe src="https://player.twitch.tv/?channel=twitch&parent=www.example.com" frameborder="0" allowfullscreen="true" scrolling="no" height="378" width="620"></iframe> - Copy just the link inside the src="" section of the embed code, in this example that would be:
https://player.twitch.tv/?channel=twitch&parent=www.example.com - In this link channel=twitch would be replaced with the name of your channel (from the Twitch URL), for example channel=mygreatstream
- You now need to replace www.example.com with the URL of your Manager, if you're hosted with Emperor Servers that will look like:
hecrer.emperorservers.com - Now add the your final embed link the same way described above for the wikipedia link, in this example my final link is this:
https://player.twitch.tv/?channel=twitch&parent=hecrer.emperorservers.com
After that I'm left with this beneath my main Live Timings section:
¶ Showing Live Timings On Your Stream (Overlays)
It's possible to overlay elements from the Live Timings page onto your stream via OBS, we've often seen this used to overlay the track map, as seen here:
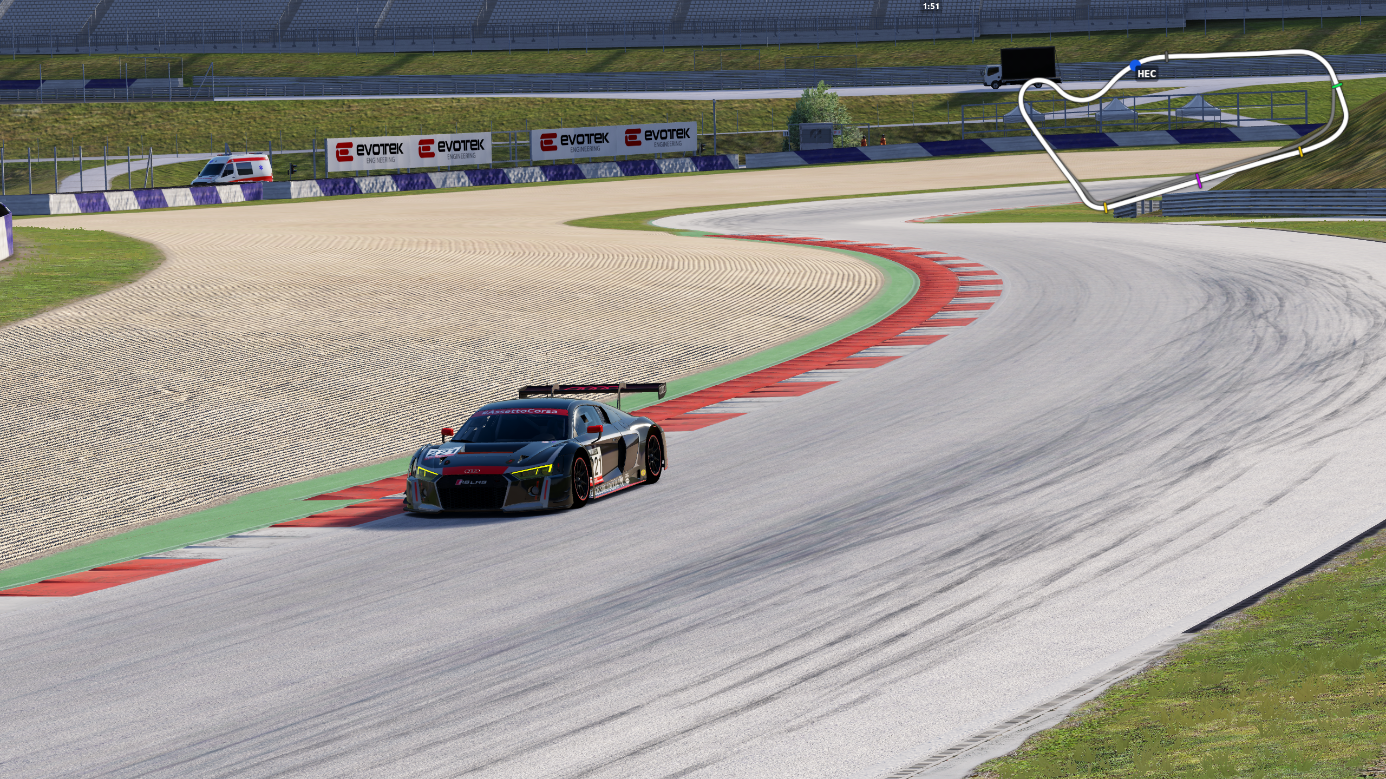
Setting this up is relatively simple, but does require a few steps, let's run through them! In this guide I'll be just showing the track map.
- On the Server Options page make sure that "Theme Type" is set to either Light or Dark. Having it set to Auto will not work with OBS!
- On the Server Options page switch "Hide Collision Popups" on, users can still make the popups visible again if they want to on the Live Timings page.
- Now we're heading over to OBS, add a new source to your scene using the plus button beneath the sources list, then select browser.
- A window will pop up, select the "Create new" option and give it a name, I'll use "Live Timings". Make sure "Make source visible" is ticked and click OK.
- Now a new window will pop up with some values we need to set:
- URL - The URL of your Live Timings page, for example
http://127.0.0.1:8772/live-timing - Width/Height - You can make this anything you'd like, but I'd recommend 1920 width and 1080 height in most cases.
- Custom CSS - We use the Custom CSS input to hide everything on the Live Timings page we don't want to see, in this case everything other than the track map. The full CSS I used for the example above is at the bottom of this section of the guide.
- Other Options - All of the checkboxes are fine at default (off) and Page permissions can be set to "No access to OBS"
- After setting those values click "Refresh cache of current page" then click "ok".
- You should now see the Live Timings map in your preview window of OBS! You can move it around, scale and crop it as you would with any source.
¶ Example CSS
This CSS will only show the track map, hiding all other elements of the Live Timings page. It also increases the size of the driver dots and names to make them more readable.
body {
    background-color: transparent;
    padding-top: 0px;
    overflow: hidden;
}

.navbar, .race-control-event-info, .race-control-weather-info, .text-center, .race-control-buttons, #popover-content-event-title, #popover-content-admin-panel, .col-lg-7.col-md-12.mt-5, .live-frames, footer  {
    display: none !important;
}

.mt-5, .my-5 {
    margin-top: 1rem !important;
}

.dot .name {
   font-size: 120%;
}

.map-key-link {
  display: none;
}

#chat-container {
  display: none;
}

#broadcast-chat-form {
  display: none;
}

.popover {
  display: none;
}

#popover-content-map-key {
  display: none;
}

#live-table-disconnected {
  display: none;
}

.table-responsive {
  display: none;
}

h4 {
  display: none;
}

.alert  {
    display: none;
}